


Tesla taillight assembly repairs are necessary due to wear and tear from weather, UV radiation, and regular use, which can lead to water ingress and corrosion. Accidents also cause significant damage. A specialized collision repair shop ensures accurate repairs, preserving both functionality and aesthetics. The process involves assessing damage, replacing severely damaged housing units, testing lights, and making final adjustments. Regular maintenance, including inspections and cleaning, is crucial to prevent future issues and keep the taillights functional for an extended period.
Looking to fix that flickering or damaged Tesla taillight assembly? You might not just need a quick fix—the solution could involve replacing the entire housing. This comprehensive guide delves into the common issues plaguing Tesla taillight assemblies, walks you through the intricate repair process, and offers essential tips for maintaining optimal performance after the fix. By understanding these steps, you’ll be equipped to tackle the issue like a pro, ensuring your Tesla’s tailights shine brightly.
- Understanding Tesla Taillight Assembly Issues
- The Process of Repair and Replacement
- Tips for Maintaining Your Tesla Taillights After Repair
Understanding Tesla Taillight Assembly Issues

Tesla taillight assembly issues can arise due to various factors, making it a common problem for Tesla owners to encounter. One of the primary reasons is regular wear and tear, as these components are constantly exposed to harsh environmental conditions, including rain, snow, and UV radiation from sunlight. Over time, this exposure can weaken seals and gaskets, leading to water ingress and potential corrosion.
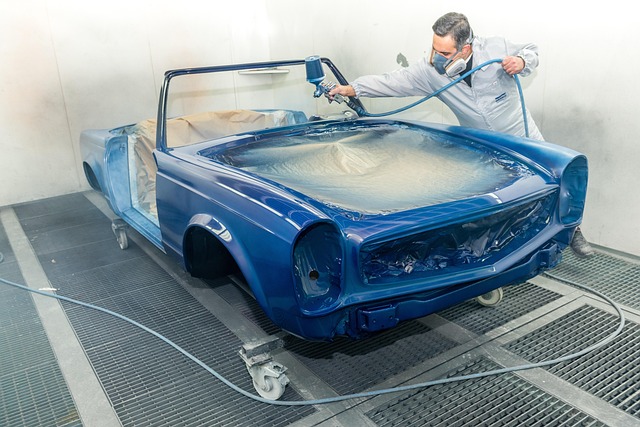
Additionally, accidents or collisions can cause significant damage to the taillight assembly. Crashes may result in cracked or broken parts, compromising both functionality and aesthetics. In such cases, a Tesla taillight assembly repair might be necessary, often involving the replacement of the entire housing for proper restoration and longevity. A reliable collision repair shop or auto body shop with expertise in Tesla vehicle paint repair can ensure that these repairs are done accurately, preserving the vehicle’s appearance and safety standards.
The Process of Repair and Replacement
The Tesla taillight assembly repair process involves several steps, especially if damage is extensive or the housing is beyond repair. Often, this may necessitate replacing the entire housing unit rather than just the light itself. The first step in the auto frame repair process for a Tesla taillight is to assess the damage and determine the extent of the needed repairs. This includes inspecting the light’s functionality and checking for cracks or deformations in the housing. If the housing is severely damaged, it may be best to replace it entirely as part of an automotive collision repair to ensure the taillight functions optimally and maintains a seamless fit.
During the replacement process, skilled technicians at a reputable auto collision center will carefully remove the old taillight assembly, taking note of how it was attached for accurate reassembly later. They then install the new housing, ensuring proper alignment with the vehicle’s body. This involves precise measurements to guarantee that the new taillight assembly fits seamlessly, matching the original design and aesthetic. Once installed, the lights are tested to verify their functionality before final adjustments are made, guaranteeing a safe and effective taillight system for your Tesla.
Tips for Maintaining Your Tesla Taillights After Repair

After undergoing a Tesla taillight assembly repair or even a full housing replacement, proper maintenance is key to ensuring your lights remain functional and aesthetically pleasing. Regularly inspect your taillights for any signs of damage, cracks, or loose connections. Keeping an eye out for these issues early on can prevent more extensive repairs down the line.
Consider incorporating some simple habits into your vehicle care routine. For instance, washing your car regularly, especially during winter when salt and sand can accumulate, will help maintain the integrity of your taillight housing. Additionally, using a microfiber cloth to gently clean the lenses can restore their clarity and prevent yellowing over time. Remember, a well-maintained car body (including repairs like Tesla taillight assembly repair or car bodywork services) is less prone to future damage, ensuring your vehicle looks its best for longer.
When addressing a Tesla taillight assembly repair, it’s clear that full housing replacement may be necessary. By understanding common issues and the repair process, car owners can ensure their vehicle’s safety and maintain optimal lighting performance. Following the recommended maintenance tips after the repair will help extend the lifespan of your Tesla’s taillights, ensuring you navigate the roads with confidence and peace of mind. For any concerns or complex repairs, consulting a professional mechanic is advised. Remember, a well-maintained taillight assembly contributes to safer driving conditions, especially in today’s fast-paced world.